V3 released in time for the holidays!

Just in time for the season! ?We have been busy building this latest version for the past 3 months and it really shows. ?The entire front end of easycart has received a major revision and updated look. ?Don’t let the looks detract though, as this entire front end system now is highly configurable and will increase sales with better conversion rates and higher usability from product to checkout.

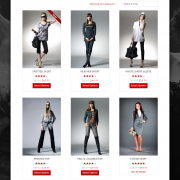
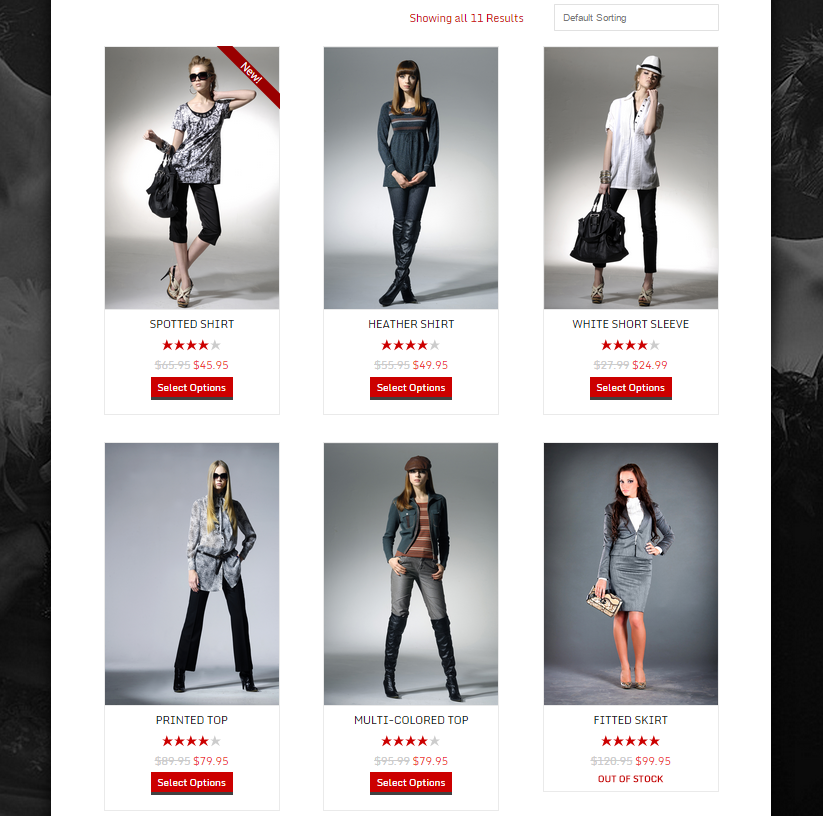
New Product Displays

Products are now highly configurable on a ‘Per Page’ basis. ?Meaning you can set columns and animation for each page individually on your website. ?With our new ‘On-Screen’ sidebar editor, you can setup the store ?while you see it on your computer.

products---clothing


New On-Screen Editor

Logged in as an admin, you can now change store designs from pre-designed layouts to picture hover effects. ?Basic color adjustments are easy as well as responsive settings for different devices. ?While EasyCart is meant to make it easy for you to sell goods, it is also easy for your customers to utilize.

You can even setup how many columns best fit in your theme and on each device such as tablets and phones.

products---sidebar


?Preview on ?Devices!

One of the great new features we have is our responsiveness to the design. ?Not only can you adjust columns for the products, product details, and shopping cart for various devices, but now you can actually click our device preview and see your site in action. ?Preview it on an ipad landscaped, ipad portrait, or iphone landscape and portrait. ?This real time previewing will save you time as a developer or site designer and insures your work will be seen on various devices.

device-previewer


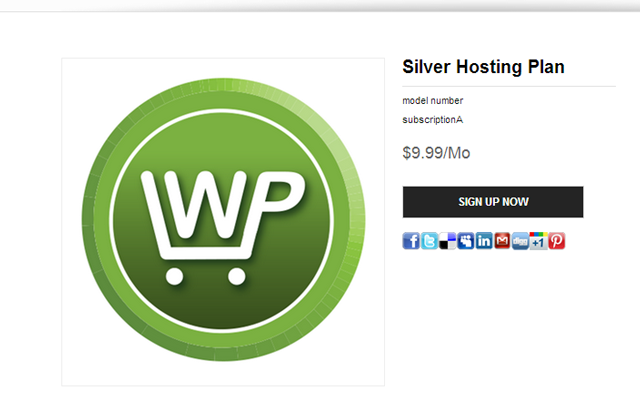
Beautiful Product Detailed Displays

The entire process was redesigned at the product detail level. ?Making ?for a cleaner styling and easier shopping experience for customers will convert more users into clicking that ‘Add to Cart’ button. ?You can even choose to have the layout in 2 columns or 1 column for individual devices and orientations.

productdetails---watch


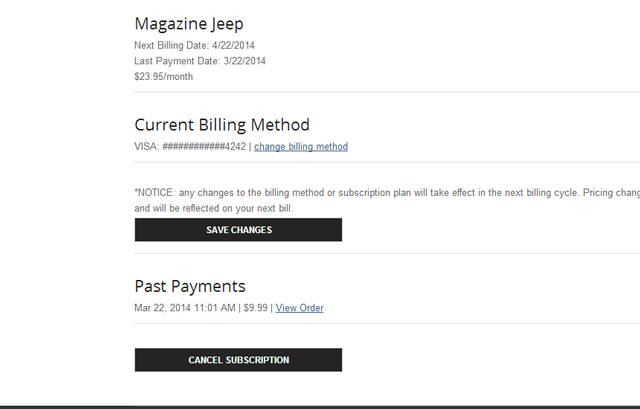
Upgraded Checkout Experience

We also worked out a better checkout design that is responsive and can fit into any theme. ?Fitting a lot of flexible options into a checkout process is a difficult process for shopping cart makers like ourselves, but with V3, we feel we hit the nail on the head with this checkout process being flexible enough to accommodate all our features, yet streamlined and easy to look at and responsive enough for a phone.

checkout


Interested in more?

Just check out our working demos at http://www.wpeasycart.com/demos and see for yourself how easy the shopping experience can be, how vivid the design can integrate into your theme, and how you can start selling this holiday season quickly and easily with the most feature rich WordPress shopping cart solution on the market.


GoDaddy Shared Hosting Now an Issue

Hosted Through GoDaddy’s Inexpensive Shared Hosting Plan?

Hosting on GoDaddy and seen this lately: “Returned Fault: NetConnection.Call.Failed”? You’re not alone…

As of sometime around July 22, 2014, GoDaddy has implemented what are called “Phase 2 mod_security rules”. These rules are extreme and, according to GoDaddy, necessary to preventing brute force attacks on their WordPress installs. What is so awful about preventing these attacks? Well in this case they block any IP that accesses a script repeatedly over a short period of time. This means any application, by any company, that accesses a gateway for a phone application, web application, or AJAX application will be temporarily banned from the site. You can see this for yourself by accessing the WordPress “admin-ajax.php” file that is used to run any behind the scenes data pulls that can make your site look so fancy. It also means that the WP EasyCart admin consoles will lock up after a few clicks around, which is less than ideal.

Minimal Good News

The very little good news we can provide is that although your IP is temporarily blocked, no other users on your site will have the same experience. This means downtime for you, but not for your sales, which is a small win in this situation. That is all we can find for our shared host GoDaddy users though.

Solutions to This Issue

  • Contact GoDaddy and ask them to “white list your IP address for the mod_security on your host”. This will prevent their security measures from blocking you on your own server. You can find your IP address by typing in, “what is my IP” on Google. Keep in mind, you will need to have them white list any IP that will be accessing the site using the WP EasyCart admin tools.
  • GoDaddy suggests that you upgrade to a VPS server and this option has been verified as a solution by multiple customers.
  • Switch hosts, GoDaddy appears to have implemented this to upsell their customers from their very low priced services. Blue Host has speeds of 4-5x that of GoDaddy for WordPress installs and we highly recommend them.

Error Log Through Testing

For your reference, if you are interested in seeing what GoDaddy is doing exactly with their servers:

  • [Wed Jul 23 23:21:56 2014] [error] [client XX.XXX.XX.XX] ModSecurity: Access denied with connection close (phase 2). 1 [file “/web/httpd2/modsecurity.d/activated_rules/modsecurity_gd_07_post_guardian.conf”] [line “36”] [id “XXXXX”] [msg “BLOCKED – Bot detected! Score: 54:4:36:0:1:95”] [hostname “yoursite.com”] [uri “/wordpress/wp-content/plugins/wp-easycart/inc/amfphp/Amfphp/index.php”] [unique_id “XXXXXXXXXXXXXXX”]
  • [Wed Jul 23 23:21:56 2014] [error] [client XX.XXX.XX.XX] ModSecurity: Access denied with connection close (phase 2). 1 [file “/web/httpd2/modsecurity.d/activated_rules/modsecurity_gd_07_post_guardian.conf”] [line “25”] [id “XXXXX”] [msg “BLOCKED – Automated Attacks(cached)”] [hostname “yoursite.com”] [uri “/wordpress/wp-content/plugins/wp-easycart/inc/amfphp/Amfphp/index.php”] [unique_id “XXXXXXXXXXXXXXX”]
  • [Wed Jul 23 23:21:56 2014] [error] [client XX.XXX.XX.XX] ModSecurity: Access denied with connection close (phase 2). 1 [file “/web/httpd2/modsecurity.d/activated_rules/modsecurity_gd_07_post_guardian.conf”] [line “25”] [id “XXXXX”] [msg “BLOCKED – Automated Attacks(cached)”] [hostname “yoursite.com”] [uri “/wordpress/wp-content/plugins/wp-easycart/inc/amfphp/Amfphp/index.php”] [unique_id “XXXXXXXXXXXXXXX”]

Stripe Integration with Subscription Services

The latest release of 2.1.6+ of EasyCart now includes a great new and powerful payment processor that is our new favorite. ?The Stripe payment gateway solution is now complete and we included a full subscription/membership system into EasyCart as well. ?Now you can offer a recurring payment product to your customers and they can signup directly on your site. ?All payment information is synced up with the Stripe payment processor and allows complete customer and administrative control.

Build Subscription Products

From EasyCart, creating a subscription is as easy as setting up any product. ?Simply check that it is a subscription, pick how often you want the recurring payments to occur, pick a url if you like for them to access membership content (optional), and whether there is a trial period and the EasyCart system does the rest. ?Customers will see the subscription product like any other product, except they will see a ‘Sing Up Now’ button instead of ‘Add to Cart’ button.

subscriptionservices

Once users sign up, information is approved by Stripe and the subscription is placed into the EasyCart subscription system along with their first order being placed. ?Each recurring payment will appear as an order in your system.

Administrate Subscriptions

EasyCart administrative tools are completely integrated to communicate with Stripe and allows you to pull up subscriptions, upgrade or downgrade customers, cancel their memberships, and review all related information regarding their subscription. ?You can also see a quick payment history of their subscription.

subscriptionmanagement


Customer Subscription Management

Customers also have access to a complete subscription management area from within their account. ?Customers can quickly update their credit card information, upgrade or downgrade their subscription, change billing address information, and/or cancel their membership at anytime. ?This gives you the store owner less support and interaction with members as they can do all administrative tasks directly from their account.

customermanagement


Membership Content

One of the great features we offer with our subscription services is an easy to setup membership area system. ?Simply create a new WordPress page, apply our members only shortcode, and then only logged in subscribers can access the new content. ?This makes a great way for you to feed membership content to customers who have purchased a subscription if that is required by your business.

membershipcontent


Matching the Store Page Setting for a Kriesi Theme

If you haven’t already taken a look at the site www.kriesi.at, you should look now. This ?site has some of our favorite themes out there and all use the “avia framework” to help you and your client build outstanding content using some really nice visual editing tools. The one problem we run into is that the WP EasyCart theme is that this theme is not setup to use custom post types and their visual editing tools. For example, if you set your store page to use a left sidebar, but your default sidebar on the right, then all your product and store items will appear using the default. For many of us, this is a pain, but no worries, there is a way around it!

  1. Have the WP EasyCart version 2.0.16 or greater.
  2. Go to your WordPress Admin -> EasyCart Admin -> Store Setup -> Advanced Options and turn the “Match Store Page Meta” to “On”.
  3. You now must find the array that holds the “boxes” setup values for the avia framework. In this array, add the value “ec_store” to the ‘page’ types that are allowed to use the avia options. The file in the Choices theme is located in choices/includes/admin/register-admin-metabox.php, right at the top of this file. Image below for your reference.
  4. Go to your store page, adjust the avia settings as needed, then update the page. If you do not need to make adjustments, still hit the update button to update all store posts.

avia-update-file


If you are using the enfold theme, this file according to the Kriesi site is located here: /enfold/config-templatebuilder/avia-template-builder/config/meta.php.

Once you have updated this file, saved, and uploaded back to the server, you should begin to see the store page match up to your products.

Second Method Using Custom Widget Sidebar

Some of you may find it easier to use a custom page sidebar. This allows you to have a custom sidebar only for the store pages. This setting is available in the theme settings (this was completed in the Chioces theme) in the sidebar section.

store_custom_sidebar


Once you have this created, go to your widgets section and add the appropriate widgets to this new custom sidebar.

store_widgets


Now that you have your widgets, you need to ensure this custom sidebar shows up for all store items. This requires some custom code. To do this, open your “sidebar.php” in your Krieisi Theme. Look for the place where it sets the following variable:

$custom_widget_area = avia_check_custom_widget( ‘page’ );

Below this line, add the following:

if( get_post_type( $post->ID ) == “ec_store” ){
$custom_widget_area = “store”;
}

You need to exchange the text ‘store’ for the name of your sidebar. This will be the name above labeled “Page: store”, e.g. Your site might be “Page: shop my store” and in this case, use the $custom_wwidget_area = “shop my store”.

Javascript Validation Customization

The WP EasyCart is setup to validate at the very minimum for non-US customers. This is because validation requirements vary so much from country to country. To make the system as flexible as possible, there is the opportunity to add custom validation for each and every country and a backup validation for those countries that are not specifically specified.

All validation is available in your theme folder, wp-content/plugins/wp-easycart-data/design/theme/{your theme}/ec_validation.js

If you do not know what your theme is, click here to learn how to figure that out.

validate_imag1


As you can see from this function example, the javascript validate function takes a ‘function_name’ and a ‘country_code’. If your country had, for example, a specific address format, you could edit the way the ‘input’ value is validated. If you often sell to the US and UK, you could add an ‘else if’ statement to validate the two countries differently.

Here is a nice example of how you would improve the state validation to check for a correct entry of a Canadian province. The addition is the ca_provinces variable as well as the ‘else if’ for the ‘country_code’ “CA”.

ca_province_example

Where to Find the Correct Layout File

We get many requests that ask, where do I find it!? This is the hardest part of learning any new system and being able to leverage it in your project. Hopefully some of this will be cleared up below. All of the following information is related to files located in your EasyCart store layout in the wp-easycart-data/design/layout/{my layout}/ folder.

For information in finding your selected layout click here.

The Product List/Grid Page

  • The Product Page – This is the main holder for the entire store page when displaying a list/grid of products.
    • ec_product_page.php
  • The Filter Bar – This is the bar that appears above the list/grid of products and includes a sort box, items per page links, and page set links.
    • ec_product_filter_bar.php
  • The Product- This is a product displayed in a grid format. It is pulled in for each product that is displayed on the given page.
    • ec_product.php
    • Made up of two parts, a quick view popup box followed by a holder for the product.
  • The List Type Product – This is not available in all layouts, but when it is used, it displays a product in a list format. It is pulled in for each product that is displayed on the given page
    • ec_product_list.php

The Product Details Page

  • The Product Details Page – This is the shell for the entire product details page.
    • ec_product_details_page.php

The Cart

  • The Cart page – This is the shell for the entire cart page and is what decides which elements of the cart to display.
    • ec_cart_page.php
    • Includes empty cart container, continue shopping button, checkout button, payment page order message, and the submit order button.
  • The Cart – This is where the customer sees items they have added to their cart.
    • ec_cart.php
    • Includes the column headers, container for cart items, gift card input, coupon code input, estimate shipping input, and the totals box
  • The Cart Item – This is the repeated container that displays the unit price, quantity, total price, options selected, title, and image.
    • ec_cart_item.php
  • The Cart Login Panel – This is the area where the customer can log into their account or proceed as a guest.
    • ec_cart_login.php
  • The Cart Logged In Panel – This is the line that tells the user they have logged in or proceeded as a guest that is displayed above the billing, shipping, and contact information.
    • ec_cart_login_complete.php
  • The Cart Billing Information – This is where the user inserts their billing address information.
    • ec_cart_billing.php
    • Includes the option radio box to use a different shipping address
  • The Cart Shipping Information – This is where the user inserts their shipping address information.
    • ec_cart_shipping.php
  • The Cart Contact Information – This is where the user inserts their first name and last name and, if checking out as a guest, their email address and optional password.
    • ec_cart_contact_information.php
  • The Cart Shipping Method – This is the container for the available shipping methods.
    • ec_cart_shipping_method.php
  • The Cart Address Review – This is the area in which the customer can review their entered billing and shipping information and check the selected shipping method.
    • ec_cart_address_review.php
  • The Cart Payment Information Selection – This is where the customer can pick and enter their selected form of payment.
    • ec_cart_payment_information.php
  • The Cart Success Page – This is the page that displays the receipt to the customer after an order has been completed.
    • ec_cart_success.php
  • The Third Part Redirect Page – In cases where the javascript redirect fails for third part checkouts, the form is displayed on this page.
    • ec_cart_third_party.php

Order Receipt

  • The Emailed Receipt – This is the layout of the email receipt sent to the customer on order completion.
    • ec_cart_email_receipt.php
  • The Printable Receipt – This is the layout of the printable version of the receipt which is accessed from a print button on the account order details page.
    • ec_account_print_receipt.php

The Account

  • The Account Page – This is the main shell for the entire account.
    • ec_account_page.php
  • The Login Page – This is where the customer logs into their account.
    • ec_account_login.php
    • Includes a link to forgot password and to register
  • The Forgot Password Page – This is where the customer can retrieve their password.
    • ec_account_forgot_password.php
  • The Password Recovery Email – This is the emailer sent to the customer about their password
    • ec_account_retrieve_password_email.php
  • The Register Page – This is where the customer can register for an account.
    • ec_account_register.php
  • The Dashboard – This is the landing page for a user that is logged into their account when they reach the account page directly.
    • ec_account_dashboard.php
    • Includes column headers for recent orders, container for recent orders, and containers for basic user information
  • Edit Billing Page – This is the page where a customer can edit their billing information.
    • ec_account_billing_information.php
  • Edit Shipping Page – This is the page where a customer can edit their shipping information.
    • ec_account_shipping_information.php
  • Edit Password Page – This is the page where a customer can edit their password.
    • ec_account_password.php
  • Edit Personal Information Page – This is the page where a customer can edit their personal contact information.
    • ec_account_personal_information.php
  • View Orders List – This is the page where a customer can see a list of their orders and click view more for each.
    • ec_account_orders.php
  • Single Order Line Item – This is the line item you see on the dashboard and in the order list.
    • ec_account_order_line.php
  • Order Details Page – This is the page that shows all the information relating to the order.
    • ec_account_order_details.php
  • Order Details Item – This is the individual product in the order details.
    • ec_account_order_details_item_display.php

What Makes Up a WordPress Store Design

A WordPress site is made up of the WordPress structure, a theme, plugins, and content. A WordPress theme is what makes the website look a specific way to the customer. It is made up of css, javascript, and php which depicts how the website is displayed to the viewer. Once setup, a website owner can then add and develop content as they see fit. Many website owners need a way to sell products and this is where the EasyCart comes in. The EasyCart is built with the same structure of WordPress and is made up of css, javascript, and php. The EasyCart, however, is a plugin and is loaded after WordPress loads and because of this requires its own css and javascript to make it function correctly.

The WP EasyCart is made up of the EasyCart core, an EasyCart theme, and an EasyCart layout. The EasyCart core is overwritten on each and every update. These files can be edited by a developer who understands php, but should be done with the realization that the plugin should not be updated on a regular basis. The design files (layout + theme) can be created, reused, and are never overwritten.

Layout and theme files exist in two places: wp-content/plugins/wp-easycart/design/ and wp-content/plugins/wp-easycart-data/design/. The system first looks in the wp-easycart-data folder and should be the place you upload and maintain your EasyCart designs. For some users, their severs will not allow us to make the new directory and because of this we have a fall back to the wp-easycart folder. If you are on a server and see this happening, we recommend creating the wp-easycart-data folder manually, then copy the design folder from the wp-easycart folder. This will prevent data loss in the future.

The layout files of a WP EasyCart can be thought of as the shell. They are a series of php function calls that pull in the pieces of the store in a particular location. Most of the time the pieces of the shell pull in content to a div tag, which is then styled by the CSS. This allows a designer to move the pieces around as they are needed to create any look they want.

The theme files of a WP EasyCart is what makes the store, account, and cart pages display properly to the user. The css and javascript can be edited to create any look and act in any way necessary.